

Creating a job & uploading a plan set
How do I start a new job and upload a plan set?
Start here when you have a building plan PDF and need a new takeoff job.
Before you begin
- You need to be an Estimator, Site Admin or Org Admin. Without one of those roles the upload screen shows Cannot create jobs here and you will not see the controls below. Approvers cannot start jobs.
- Prefer the designer's original PDF. Scanned photos of drawings still process, but detection quality is worse. The app may show a scanned-plan warning; it does not block you.
- PDF (or a ZIP of PDFs) up to 100MB.
What to watch for
- Scanned plans give worse results than the original file from the designer.
- After Begin Job, Measure may open when the first workflow slot is ready — remaining pages can still be processing.
- Pricing access is not required to create a job. Pricing and Vault writes need the Site Admin or Org Admin role later.
1. Open Start New Job
- In the left rail, open Home, or open Jobs and select New Job.
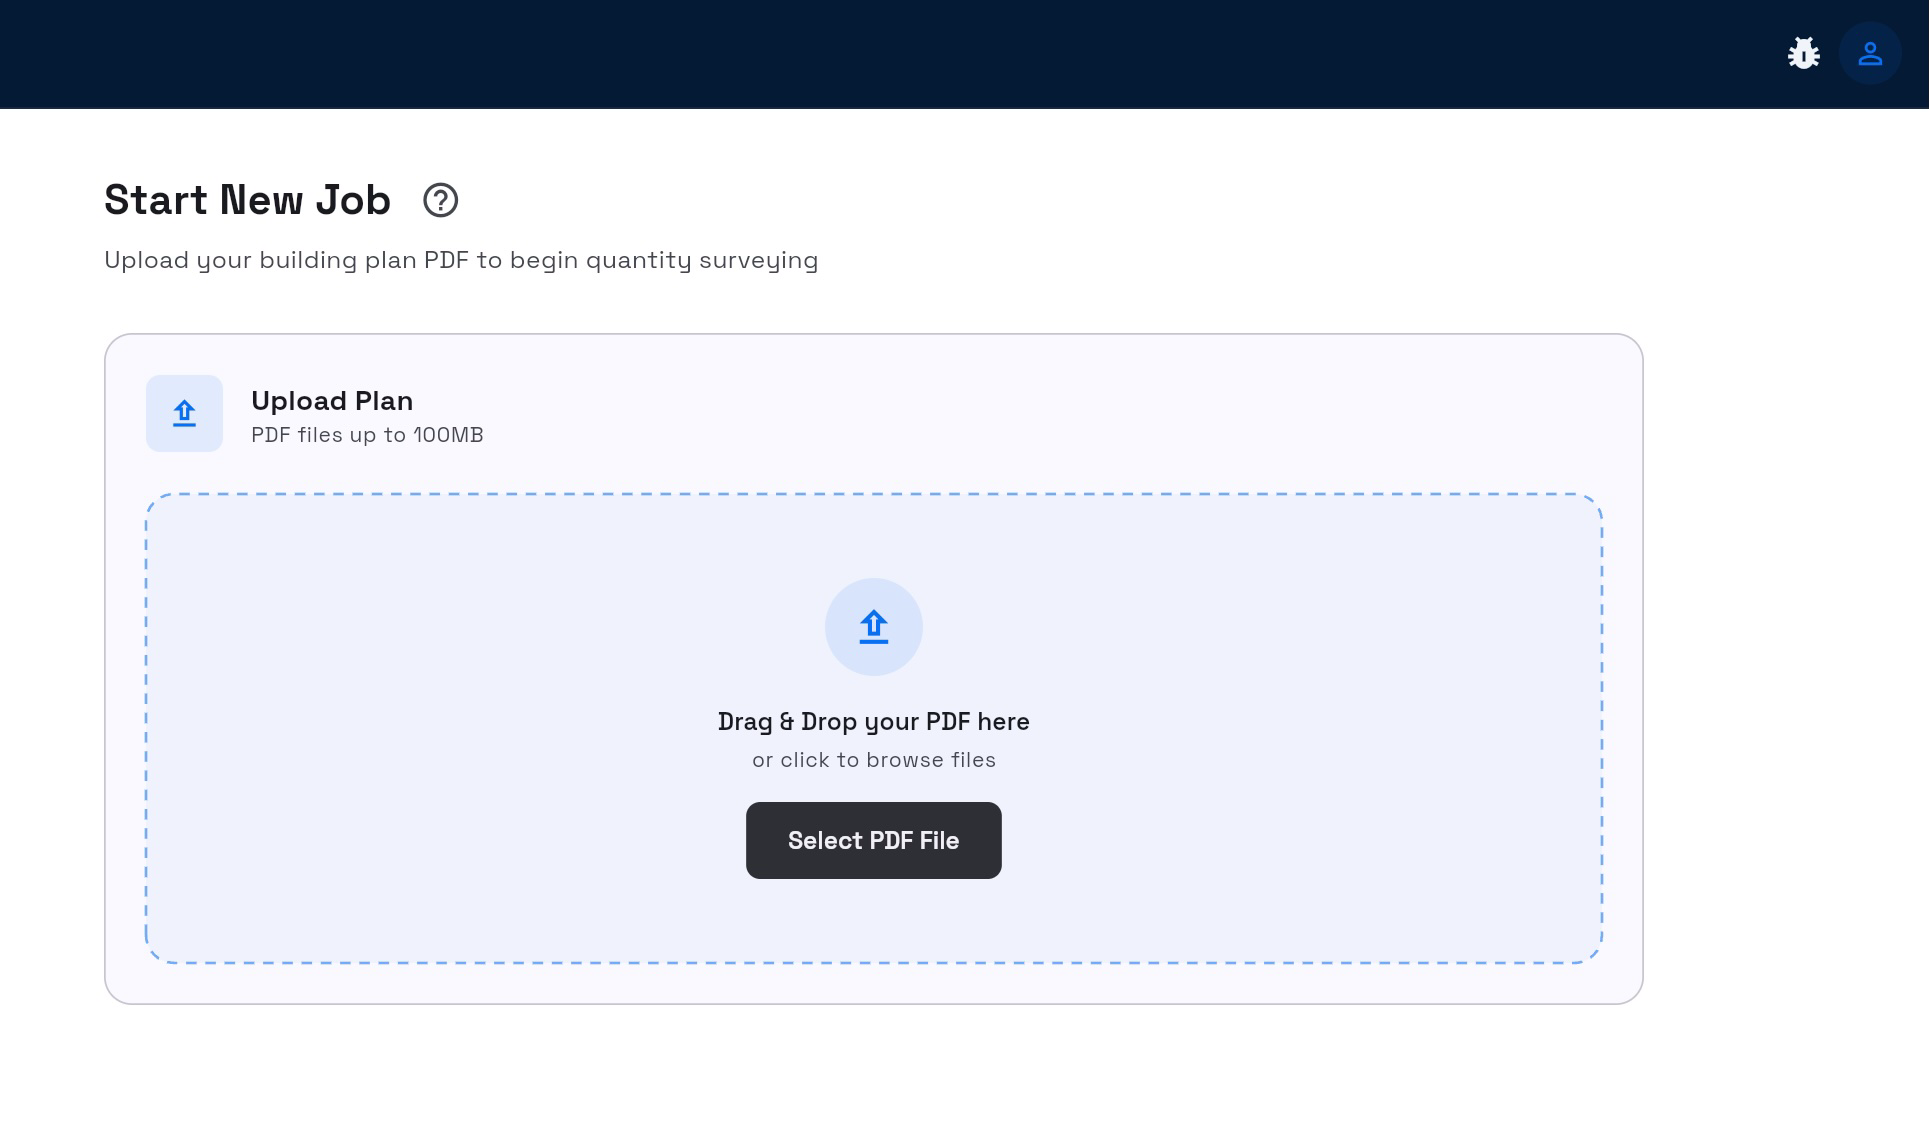
- Confirm the heading Start New Job.
2. Upload the plan PDF
-
On the Upload Plan card, drag a PDF onto Drag & Drop your PDF here, or select Select PDF File.
-
For multiple PDFs, set Plan type per file (Auto-detect, Architectural, Structural, or Combined). If you are not sure, leave Auto-detect.
-
Optionally leave Run material extraction on if you want materials later in the workflow.
-
Select Continue (or Continue (N) when several files are staged).
Success: the file status moves to Ready to continue (or the job form appears after a single-file upload).
If upload is refused, fix the message shown (wrong type, over 100MB, or a role that cannot start jobs).
3. Fill in job details
Complete the required fields on the job form:
- Building Type — required; it tailors the takeoff workflow.
- Job Name — required.
- Client Name — required.
- Country — required.
- Site Address — required, or mark the site as N/A from the address menu.
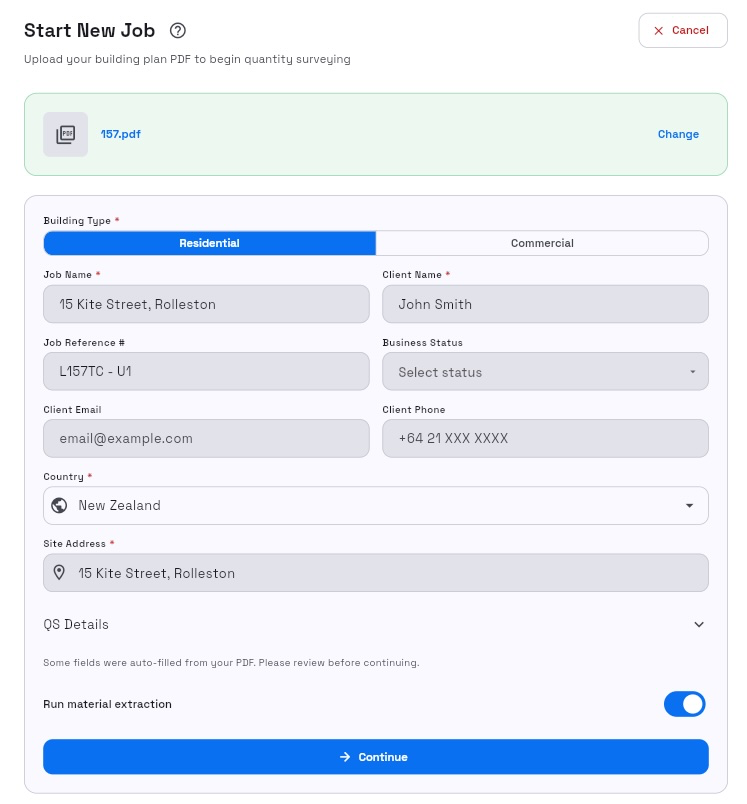
Optional fields include Job Reference #, Business Status, Client Email, Client Phone, and the QS Details expansion (Quote Due Date, Floor Area (m²), Scope of Works, Short Description).
If the PDF auto-filled values, review the banner Some fields were auto-filled from your PDF. Please review before continuing.
- Select Continue.
Success: the Select workflow step appears. Incomplete required fields stay highlighted with Complete the highlighted fields to continue.
4. Select workflow and begin
- Under Select workflow, choose the job type tile that matches your trade (labels come from the server for your organisation).
- Review Job template if shown — The bill-of-quantities skeleton this job starts from.
- Select Begin Job.
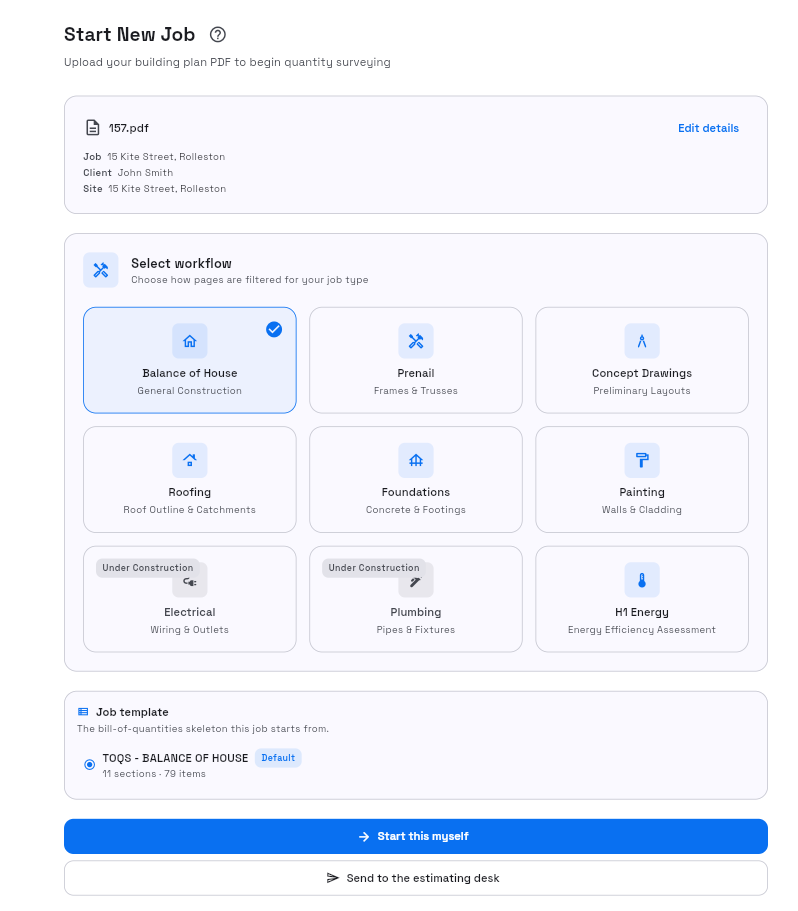
If your organisation uses the estimating desk, you may see Start this myself or Send to the estimating desk instead. For a self-serve takeoff, choose Start this myself.
Success: the button shows Starting…, then the processing card appears.
5. Wait for processing, then Measure
- Stay on Processing your plan until the job is ready to open.
- When the first workflow slot is ready you should see Job started! and Redirecting to your plan…
- You land on Measure for that job.
Success: Measure opens for the job. Remaining pages may still process; the banner can show Processing your plan — N of T pages ready.