

Drawing and editing annotations
How do I correct detected shapes, add missing annotations, and group cladding?
Use these controls when a detected outline needs correcting or a measurement is missing from the plan.
Before you begin
- Open the job in Measure, then open the workflow slot and step you need to correct.
- Drawing and editing need the Estimator, Site Admin or Org Admin role. Approvers can open Measure, but do not get these controls.
- Confirm the page scale before relying on any length or area.
What to watch for
- On an editable polygon, clicking a vertex removes it. Drag the vertex when you mean to move it.
- Clicking an edge adds a vertex. Dragging the same edge moves the full edge.
- A Box keeps four corners. Drag a corner to resize it; polygon vertex add/remove behaviour does not apply to a box.
- Two-point annotations such as valleys are edited by dragging an endpoint. Their line does not accept an extra vertex.
- Every cladding section must be assigned to a cladding group before cladding can be approved.
1. Select an annotation
- Open the relevant workflow step.
- Select the annotation on the plan or in the right-hand measurements list.
- Use the + zoom control if the handles are too close together.
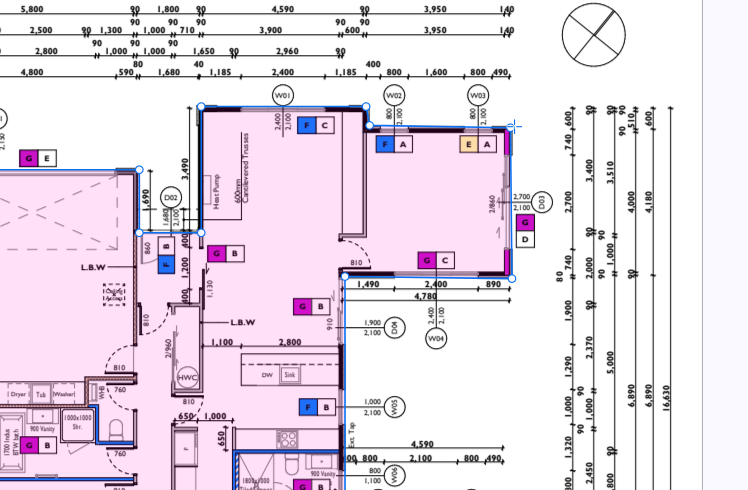
Success: the annotation has a coloured fill, a blue outline and circular handles at its vertices.
2. Add, move or remove a vertex
These actions apply to editable polygons.
Add a vertex
- Select the annotation.
- Move the pointer onto the blue edge where the new corner belongs.
- Click the edge once.
Success: a new circular handle appears at the click point.
Move a vertex
- Select the annotation.
- Drag the circular handle to the correct point on the plan.
- Release the pointer.
Success: the outline follows the new corner and the measurements in the right rail recalculate.
Remove a vertex
- Select the annotation.
- Click the circular handle once without dragging it.
Success: the handle disappears and the two adjoining edges become one edge.
3. Move a full edge
Use this when the direction of an edge is right but the whole edge is offset from the plan.
- Select the annotation.
- Move the pointer onto the middle of the edge.
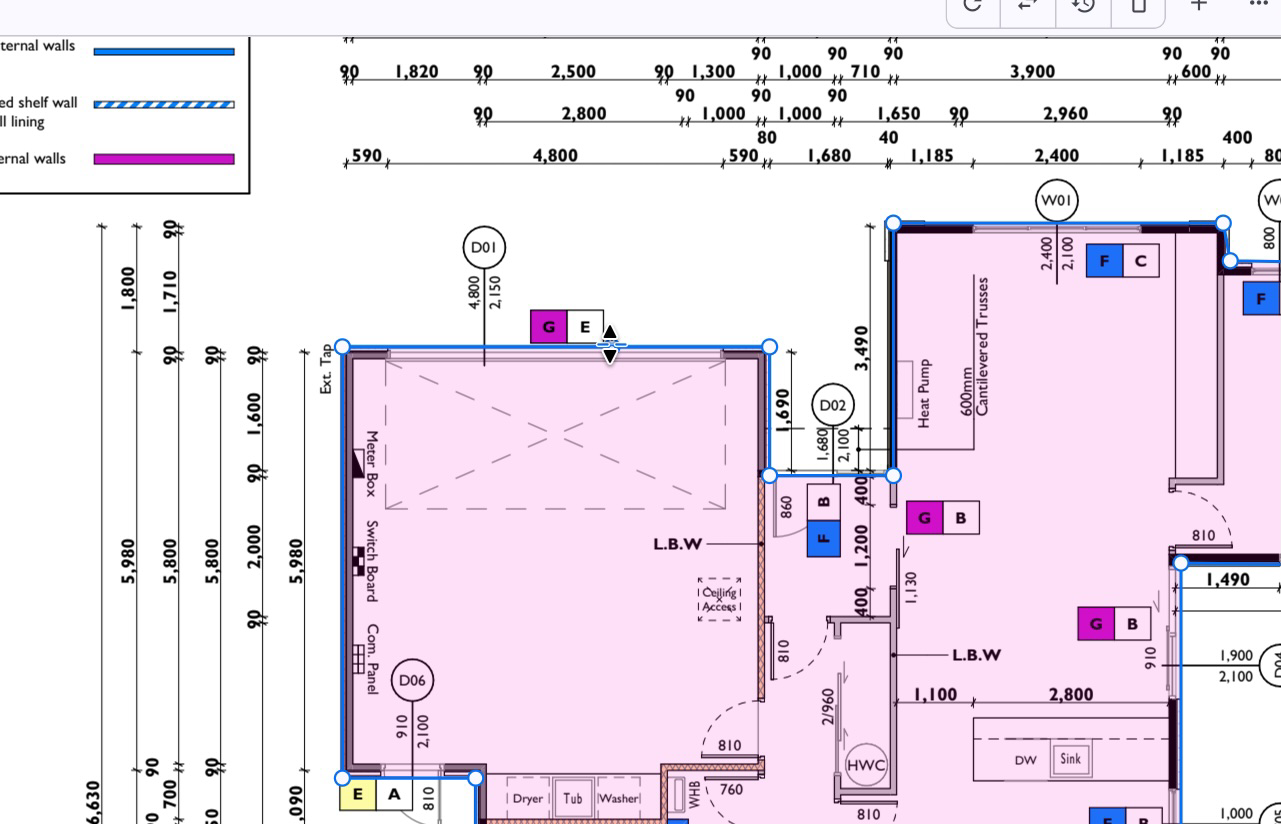
- Wait for the two-arrow resize cursor.
- Drag the edge to the correct position.
- Release the pointer.
The drag is perpendicular to the edge. A horizontal edge moves up or down. A vertical edge moves left or right. An angled edge moves on its matching diagonal.
Success: both ends of the edge move together while the other vertices stay in place.
4. Move the whole annotation
- Select the annotation.
- Move the pointer over the body of a small box, or close to the outline of a larger shape.
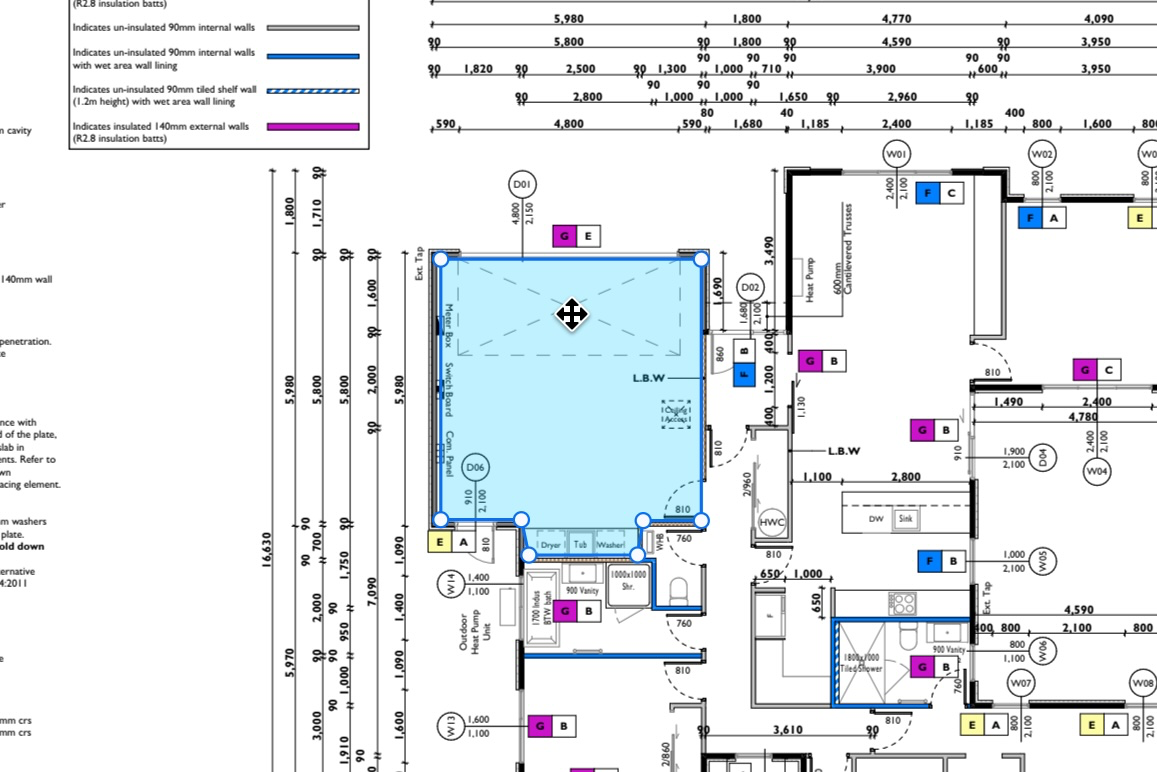
- Wait for the four-arrow move cursor.
- Drag the annotation into position.
- Release the pointer.
Success: the complete shape moves without changing its corners, area or length.
5. Delete a complete annotation
- Select the annotation.
- Select the rubbish-bin icon on its card in the right rail.
- In Delete annotation?, select Delete.
Success: the annotation and its measurements disappear from the canvas and right rail.
6. Add a missing workflow annotation
Each workflow step names its add button after the measurement. Examples include Add Deck, Add Window, Add Valleys and Add Soffit.
- Open the workflow step that owns the missing measurement.
- Select Add {annotation}.
- Choose Polygon or Box when both are offered.
- Draw the annotation:
- For Box, drag from one corner to the opposite corner.
- For Polygon, click each corner in order, then select the green tick.
- Repeat if the plan has another area of the same type.
- Select Done Adding {annotation} when finished.
Success: the new annotation appears on the plan and in the right-hand measurements list.
Add or correct a two-point line
For a line annotation such as a valley:
- Select Add {annotation}.
- Click the first endpoint.
- Click the second endpoint.
- To correct it later, select the line and drag either endpoint.
Success: the line connects the two required points and its length updates in the right rail.
7. Assign cladding sections
Cladding has an extra grouping step. Correct the cladding outlines before assigning their material.
- Open Elevation → Cladding.
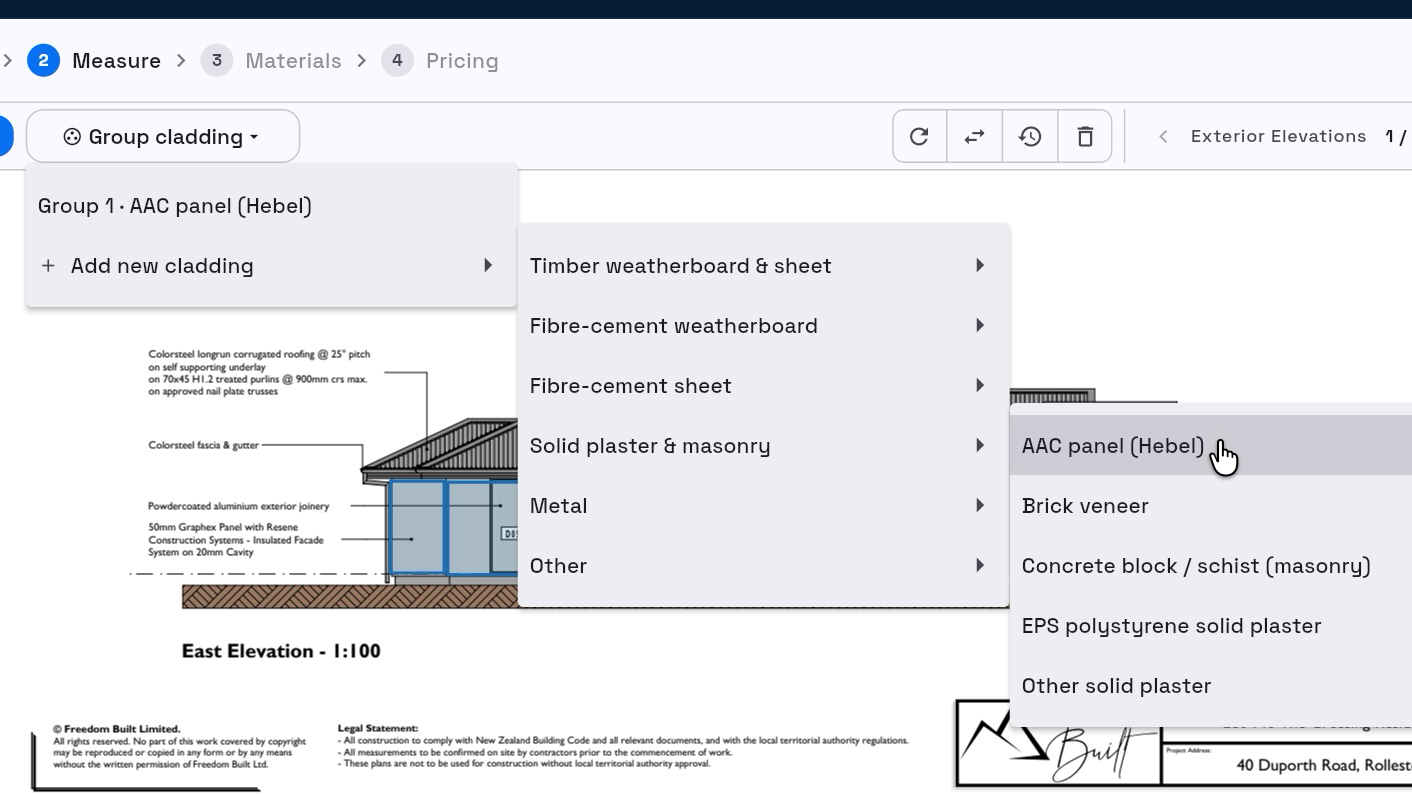
- Select Group cladding.
- Choose the cladding type.
- Choose Vertical or Horizontal when that cladding type offers an orientation.
- Check that the button changes to Assigning: {cladding type}.
- Select one cladding section, or drag over several sections to assign them together.
- Select Assigning: {cladding type} again to finish that group.
- Repeat for each different cladding type on the elevations.
Success: assigned sections use the group colour, a group card appears in the right rail, and window and door openings are deducted from the grouped area.
8. Add a custom annotation
Use a custom annotation for a plan item that is not part of the current workflow.
- Open Draw tools at the bottom of the canvas.
- Choose the measurement shape:
- Polygon or Bounding Box for an area.
- Line for a length.
- Count Marker for a quantity.
- In Name annotation, enter what you are measuring.
- Check the Measured as line matches the result you need.
- Select Start Drawing.
- Draw the area or line, or place each count marker.
Success: the saved measurement appears under Custom in the right rail with its area, length or quantity.
What’s next
- Return to Verifying the takeoff to approve the corrected measurements.
- Continue to Pricing a job & applying a BOQ template when Measure is complete.